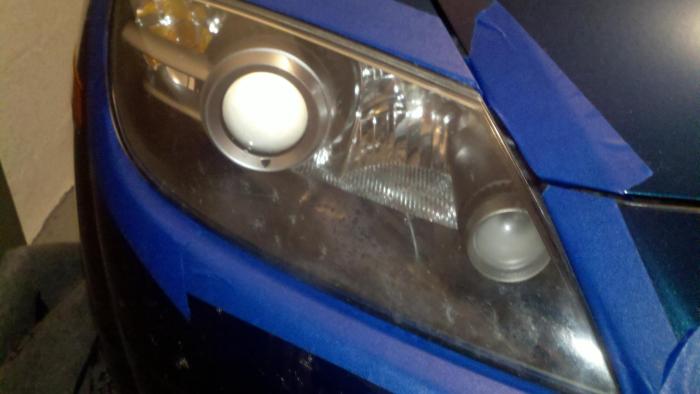
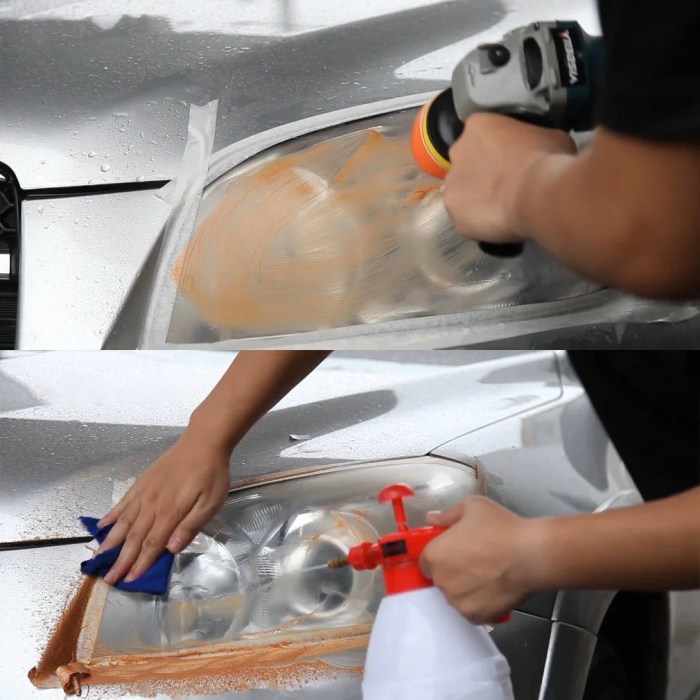
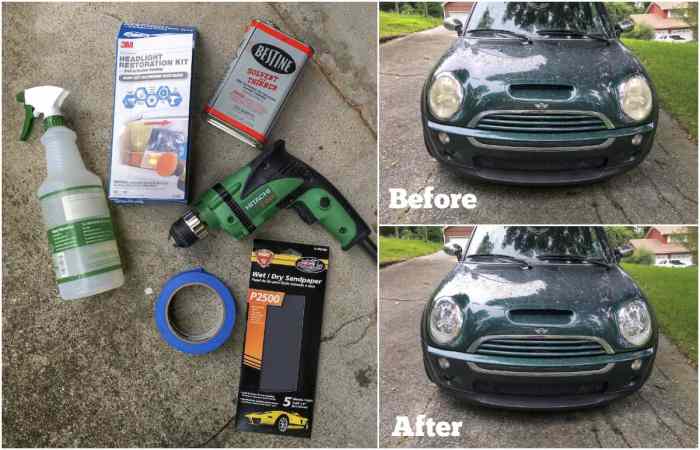
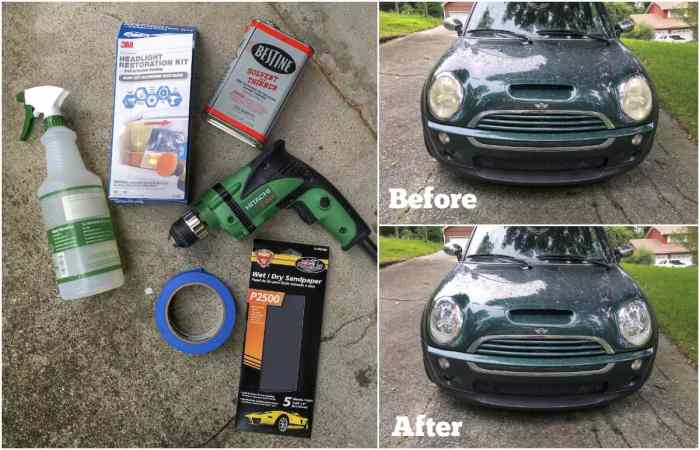
DIY headlight restore is a simple and effective way to improve your car’s visibility and safety. Over time, headlights can become cloudy, yellowed, or scratched, reducing their ability to illuminate the road ahead. This can make driving at night or in poor weather conditions significantly more dangerous. By restoring your headlights, you can regain optimal lighting and enhance your overall driving experience.
This guide will walk you through the process of restoring your headlights using readily available materials and tools. We’ll cover everything from assessing the damage to applying a protective coating, ensuring that you have the knowledge and confidence to tackle this project yourself.
Gathering Supplies and Tools

Restoring your headlights to their former glory requires a few essential tools and materials. You’ll need to invest in a kit or gather individual items, depending on your budget and desired level of detail. This section will guide you through the necessary supplies and help you make informed choices.
Headlight Restoration Kits
Headlight restoration kits provide a convenient way to gather everything you need in one package. They typically include sanding pads, polishing compounds, and a sealant. The quality and variety of components within these kits vary, affecting their price and effectiveness.
- Basic Kits: These kits offer a basic approach to headlight restoration, focusing on removing surface scratches and oxidation. They usually contain coarse and fine sanding pads, a polishing compound, and a sealant. These kits are suitable for minor imperfections and offer a budget-friendly solution.
- Advanced Kits: Advanced kits go beyond basic sanding and polishing. They may include additional sanding pads with varying grits, specialized polishing compounds for different levels of damage, and UV-resistant sealant for long-lasting protection. These kits are ideal for headlights with severe damage or for achieving a professional-looking finish.
- Professional Kits: These kits cater to professionals and enthusiasts seeking the highest quality results. They typically include a wide range of sanding pads, multiple polishing compounds, and advanced sealants. These kits are more expensive but offer the best chance of achieving a showroom-quality finish.
Essential Tools and Materials
Beyond the kit, you’ll need additional tools and materials to ensure a successful headlight restoration project.
- Sandpaper: Sandpaper with varying grits is crucial for removing scratches and oxidation. Choose sandpaper grits ranging from 400 to 2000 for effective removal and polishing.
- Masking Tape: Protect surrounding areas from sanding dust and polishing compound by masking off the headlight with tape.
- Cleaning Supplies: You’ll need cleaning supplies like microfiber cloths, rubbing alcohol, and a spray bottle for cleaning the headlights before and after the restoration process.
- Protective Gear: Wear protective gear like gloves and eye protection during sanding and polishing to avoid skin irritation and eye damage.
- Power Drill (Optional): A power drill with a polishing attachment can speed up the sanding and polishing process.
- Paint Thinner (Optional): In some cases, stubborn stains or coatings might require a paint thinner to remove them effectively.
Safety Precautions

Restoring your headlights involves working with abrasive materials and chemicals, so safety is paramount. It’s essential to take precautions to protect yourself from potential hazards.
Personal Protective Equipment
Always wear safety goggles to shield your eyes from flying debris and chemical splashes. Protective gloves are crucial to prevent skin irritation and protect your hands from chemicals and abrasives.
Sanding Tool Safety
Sanding tools, such as power sanders or rotary tools, can be dangerous if not used properly.
- Always wear a dust mask to prevent inhaling sanding dust, which can be harmful to your respiratory system.
- Use a firm grip on the sanding tool and avoid using excessive pressure, which can cause the tool to slip or overheat.
- Ensure the sanding tool is properly grounded and the power cord is in good condition to prevent electric shock.
Chemical Handling and Disposal
- Always read and follow the manufacturer’s instructions for handling and disposing of chemicals. Some chemicals are flammable, corrosive, or toxic, and require special precautions.
- Wear gloves and eye protection when handling chemicals. Avoid contact with skin or eyes.
- Store chemicals in a well-ventilated area, away from heat and direct sunlight.
- Dispose of chemicals properly, following local regulations and guidelines. Do not pour them down the drain or into the trash.
Working Area Safety, Diy headlight restore
- Work in a well-ventilated area to prevent the buildup of sanding dust or chemical fumes.
- Use a drop cloth or tarp to protect your work area from sanding dust and spills.
- Keep a fire extinguisher nearby in case of a fire.
Troubleshooting and Common Problems: Diy Headlight Restore

Even with careful preparation and execution, DIY headlight restoration can sometimes present challenges. This section will cover common issues encountered during the process, providing troubleshooting tips to help you overcome them and achieve the desired results.
Uneven Sanding
Uneven sanding is a common problem that can result in cloudy or hazy headlights. This occurs when you apply too much pressure in certain areas, leading to inconsistencies in the sanding pattern.
- Use consistent pressure: Apply even pressure across the entire surface of the headlight, avoiding excessive force in any one area.
- Overlapping strokes: Overlap your sanding strokes by about 50% to ensure a smooth and even finish.
- Check your work: Regularly inspect your progress and make adjustments as needed to ensure even sanding.
Scratches
Scratches can appear during the sanding process, especially if you use coarse grit sandpaper. These scratches can be difficult to remove and may require additional sanding or polishing.
- Start with finer grit sandpaper: Use a finer grit sandpaper, such as 1500 grit, to minimize the risk of scratches.
- Use light pressure: Apply light pressure during sanding to avoid creating deep scratches.
- Use a polishing compound: If scratches remain, use a polishing compound to smooth out the surface.
Haze
A hazy appearance after sanding and polishing can be caused by several factors, including improper sanding techniques, using the wrong products, or not applying enough sealant.
- Use a high-quality sealant: Apply a high-quality sealant to protect the headlight lens and prevent haze from forming.
- Clean the surface thoroughly: Before applying sealant, ensure the surface is clean and free of debris.
- Apply multiple coats: Apply multiple thin coats of sealant for optimal protection.
With a little time and effort, you can easily restore your headlights to their original brilliance. This DIY project not only improves your car’s appearance but also significantly enhances your safety on the road. By following the steps Artikeld in this guide, you’ll be able to restore your headlights to their full potential and enjoy the benefits of brighter, clearer illumination for years to come.
Restoring your headlights is a simple DIY project that can dramatically improve your car’s appearance and safety. Just like the angiotensin converting enzyme plays a crucial role in regulating blood pressure, a clear headlight ensures you can see and be seen on the road. A little elbow grease and the right tools can make your headlights shine like new, enhancing both your driving experience and your car’s curb appeal.

