DAW, or Digital Audio Workstation, is your portal to the world of music production. Think of it as your digital recording studio, packed with tools to record, edit, mix, and master your audio creations. From crafting intricate MIDI sequences to sculpting the perfect mix with plugins, DAWs are the backbone of modern music creation. This guide dives deep into the exciting world of DAWs, exploring everything from basic audio editing to advanced mixing techniques, and even touching on the hardware that makes it all possible.
We’ll explore popular DAWs like Ableton Live, Logic Pro X, Pro Tools, Reaper, and Cubase, comparing their interfaces, MIDI capabilities, and routing options. We’ll also cover crucial aspects of plugin integration, audio editing, MIDI sequencing, mixing, mastering, and collaboration techniques. Get ready to unlock your creative potential and become a DAW pro!
DAW Software Comparisons
Choosing the right DAW (Digital Audio Workstation) can feel overwhelming, especially with so many options available. This section will compare three popular DAWs – Ableton Live, Logic Pro X, and Pro Tools – focusing on their user interfaces, MIDI editing capabilities, and routing options. We’ll also delve into Reaper and Cubase’s routing workflows.
DAW User Interface Comparison
The user interface (UI) is crucial for workflow efficiency. Each DAW boasts a unique design philosophy, impacting how easily users navigate and interact with the software. The following table summarizes key UI differences:
| Feature | Ableton Live | Logic Pro X | Pro Tools |
|---|---|---|---|
| Arrangement View | Linear, session view for clip-based workflow. Intuitive for live performance and looping. | Traditional linear arrangement. Clean and organized, ideal for composing and editing. | Traditional linear arrangement. Powerful but can feel less visually intuitive than others. |
| MIDI Editor | Clean and efficient, well-integrated with the session view. | Highly detailed and comprehensive, offering extensive editing capabilities. | Functional but can feel less visually appealing and intuitive compared to others. |
| Overall Aesthetics | Modern and sleek, emphasizing visual clarity. | Classic and sophisticated, prioritizing functionality and organization. | More functional than visually appealing, prioritizing power and stability. |
| Customization | Highly customizable, allowing users to tailor the workspace to their needs. | Offers extensive customization options, including extensive keyboard shortcuts. | Offers customization, but less extensive than Ableton Live or Logic Pro X. |
MIDI Editing Capabilities
MIDI editing is a core function for any DAW. Let’s explore the strengths and weaknesses of each DAW in this area.Ableton Live excels in its intuitive clip-based workflow, making it easy to arrange and manipulate MIDI data quickly. However, its detailed editing capabilities might not match Logic Pro X’s depth. Logic Pro X offers unparalleled MIDI editing power, with features like the powerful piano roll and sophisticated scripting capabilities.
However, its sheer power can be overwhelming for beginners. Pro Tools provides solid MIDI editing, sufficient for many users, but lacks the advanced features and visual clarity of Logic Pro X or the streamlined workflow of Ableton Live.
Reaper and Cubase Routing Workflow Comparison
Routing audio signals effectively is critical for complex projects. Both Reaper and Cubase offer flexible routing, but their approaches differ. The following workflow chart illustrates these differences: Workflow Chart: Reaper vs. Cubase RoutingReaper: Reaper’s routing is highly flexible and relies heavily on its track-based system. You route audio signals by sending tracks to different busses or FX channels. This allows for complex signal chains and parallel processing.
Think of it like building with LEGOs – highly customizable, but requires more planning. Cubase: Cubase uses a more visually oriented routing system with its VST Connections. This allows for a clearer visual representation of signal flow, making it easier to understand complex routing configurations. Think of it like a well-organized wiring diagram. It offers a more structured approach, simplifying complex routing scenarios.
Plugin Integration and Workflow
Okay, so you’ve got your DAW all set up, but now the real fun begins: adding plugins! Plugins are the secret sauce that lets you shape and manipulate your audio, from subtle enhancements to complete sonic transformations. Understanding how they integrate into your DAW’s workflow is key to unlocking your creative potential.Plugins, typically in VST (Virtual Studio Technology) format, are essentially mini-programs that run within your DAW.
They act as virtual versions of hardware studio equipment like compressors, equalizers, reverbs, and synthesizers. Your DAW provides the framework for loading, connecting, and controlling these plugins, allowing you to build complex signal chains for processing audio. Think of your DAW as the conductor of an orchestra, and the plugins as the individual instruments.
VST Plugin Integration
VST plugins are integrated into a DAW using a simple, standardized process. Most DAWs have a dedicated section in their interface for managing plugins, usually a slot within a track’s mixer channel. To use a plugin, you typically select the channel where you want to process the audio, locate the plugin slot (often labeled “Insert,” “Effect,” or similar), and then browse your computer’s plugin folders to select and load the desired VST.
Once loaded, the plugin’s interface appears within the DAW, allowing you to adjust its parameters. The audio signal passes through the plugin before reaching the next stage in the signal chain.
Setting Up a Basic Effects Chain
Setting up a basic effects chain is a foundational skill for any DAW user. Here’s how you might do it, using a compressor, EQ, and reverb as an example:
- Load the Compressor: First, select the audio track you want to process. Locate the plugin slot on that track’s channel strip in your DAW’s mixer. Find and load your compressor plugin. Typical compressor parameters include threshold, ratio, attack, and release. You’ll want to adjust these settings to control the dynamic range of your audio.
- Insert the EQ: Next, add an EQ plugin to the same track, usually after the compressor. EQs allow you to shape the frequency balance of your audio. You’ll adjust the gain at different frequencies to boost or cut specific sounds. Common adjustments might involve boosting the presence frequencies or cutting muddy low-end.
- Add Reverb: Finally, insert a reverb plugin. Reverb adds a sense of space and ambience to your audio. Parameters include decay time, size, and pre-delay. You can adjust these settings to create a natural-sounding room or a more dramatic, artificial space.
The order of these plugins matters. Generally, you want to use dynamics processing (compression) first, followed by tonal shaping (EQ), and finally ambience effects (reverb). Experimentation is key!
Native vs. Third-Party Plugins
DAWs often come bundled with a selection of native plugins, which are developed by the DAW’s manufacturer. Third-party plugins, on the other hand, are created by independent developers and offer a much wider range of options and sounds.
- Native Plugins: Advantages include seamless integration with the DAW and usually solid reliability. Disadvantages are often a more limited selection and potentially less advanced features compared to third-party options.
- Third-Party Plugins: Advantages include a vast array of choices, specialized tools for specific tasks, and often more advanced features. Disadvantages can include compatibility issues, higher cost, and potential instability if not well-developed.
The best approach often involves a combination of both. Use native plugins for essential tasks and reliable performance, and supplement with carefully chosen third-party plugins for specialized effects or creative enhancements. Consider factors like budget, compatibility, and workflow needs when making your choices.
Audio Editing Techniques: Daw
Okay, so you’ve got your tracks laid down, your plugins are humming, and now it’s time to get down to the nitty-gritty: actuallyediting* your audio. This is where you transform raw recordings into a polished, professional-sounding product. We’ll cover some key techniques to help you achieve that.
Efficient audio editing is a crucial skill for any DAW user. Mastering these techniques will significantly improve your workflow and the quality of your final mix. Think of it as sculpting your sound – you’re chiseling away the unwanted bits to reveal the masterpiece underneath.
Noise and Click Removal
Removing unwanted noise and clicks is often the first step in any audio editing process. These imperfections can significantly detract from the overall listening experience. Common techniques involve using noise reduction plugins. These plugins typically work by analyzing a section of noise (like background hum or a consistent hiss) and then creating a profile to reduce similar sounds throughout the track.
Many DAWs come with built-in noise reduction tools, while others offer a vast selection of third-party plugins with advanced algorithms. For clicks, you can often surgically remove them using tools like the spot-removal function found in many audio editors. This function typically involves selecting the click and replacing it with a small section of adjacent audio, creating a seamless repair.
Remember, subtle is better than aggressive; overly aggressive noise reduction can sometimes lead to artifacts and a loss of detail in the audio.
Fade Types and Their Effects
Fades are essential for smooth transitions between sections of audio and to prevent abrupt starts and stops. Different fade types create distinct sonic characteristics. A linear fade creates a gradual decrease in volume over time. A logarithmic fade, often referred to as an exponential fade, provides a more natural-sounding decrease in volume, mimicking the way our ears perceive loudness.
Inverse logarithmic fades mirror this behavior but in reverse. S-curve fades are often used for more complex scenarios, providing a smooth transition with minimal phase shift, ideal for critical listening. The choice of fade type depends on the context and the desired effect. For example, a linear fade might be appropriate for a hard-cut transition, while a logarithmic fade is preferred for a more gentle transition between musical phrases.
So, you’re into DAWs, right? Building those killer tracks takes serious planning, and that’s where the workflow gets intense. Thinking about how to streamline your process, you might consider the parallels with architecture and construction; check out some awesome BIM software to see how they manage complex projects. The way they plan and execute is pretty rad, and maybe there’s some workflow inspiration you can bring back to your DAW setup.
Time Stretching and Pitch Shifting
Time stretching and pitch shifting are powerful tools that allow you to manipulate the tempo and pitch of your audio independently. These techniques are often used to adjust the timing of vocal performances, synchronize audio to video, or create creative effects. Algorithms like élastique, used in many high-end plugins, provide high-quality results with minimal artifacts, particularly when dealing with complex audio such as vocals.
However, remember that excessive stretching or shifting can degrade audio quality, so it’s best to use these techniques sparingly and judiciously. Experimentation is key here; find the balance between creative manipulation and maintaining audio fidelity. For example, slowing down a drum loop slightly might add a unique groove, while pitch-correcting a vocal track can improve intonation.
MIDI Sequencing and Automation
Okay, so we’ve covered the basics of DAWs, plugins, and audio editing. Now let’s dive into the world of MIDI—the digital language of music. MIDI sequencing lets you create and manipulate musical notes, drum hits, and other musical events without actually recording audio. This opens up a whole new level of creative control and flexibility. Think of it as a blueprint for your music, which you can then tweak and refine endlessly.
Automation, on the other hand, allows you to control virtually any parameter in your DAW over time, adding dynamic movement and evolution to your tracks.MIDI sequencing and automation are incredibly powerful tools for crafting professional-sounding music. They allow for non-destructive editing, meaning you can change things without affecting the original data. Plus, they make it easy to create complex rhythmic patterns and dynamic sonic textures.
Let’s explore how these features work in practice.
Creating a Simple MIDI Drum Beat
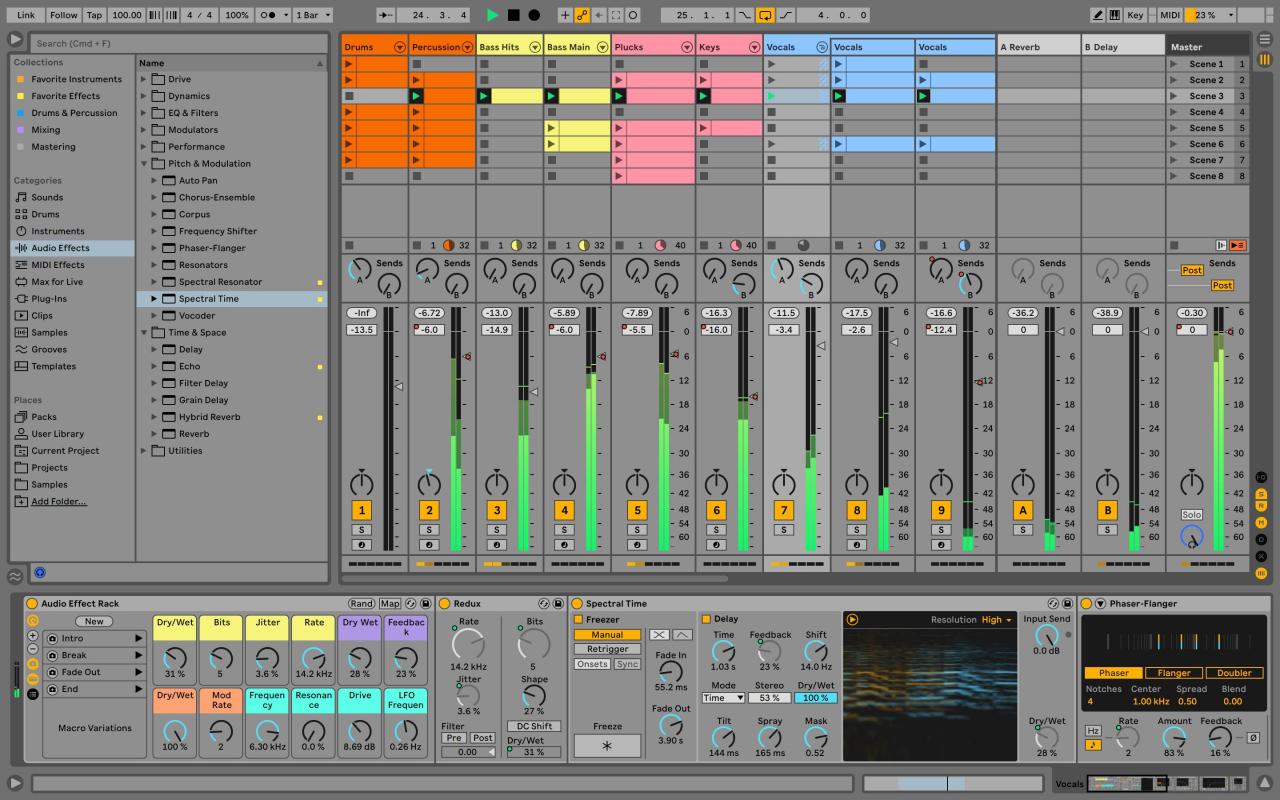
To illustrate MIDI sequencing, let’s create a simple drum beat using a DAW’s built-in drum machine. Most DAWs (like Ableton Live, Logic Pro X, or FL Studio) include a variety of virtual instruments, including drum samplers and synthesizers. We’ll use a simple four-on-the-floor beat as an example. Imagine the MIDI editor as a piano roll; each vertical line represents a beat, and each horizontal line represents a note or a MIDI event.
We’ll place MIDI notes representing kick, snare, and hi-hat hits on the appropriate beats. For example, a kick drum on beat 1 and 3, a snare on beat 2 and 4, and hi-hats on every beat.The screenshot would show a MIDI editor window. Across the top would be the timeline, showing bars and beats. Vertically, you’d see the MIDI notes represented as rectangles.
Different colors could represent different drum sounds (e.g., red for kick, blue for snare, green for hi-hat). The notes are aligned to the grid, creating the rhythmic pattern. The window would also likely display various parameters for each note, such as velocity (how hard the drum is hit), and note length. The overall visual impression is one of organized musical data, easily manipulated and edited.
Automating Volume and Panning
Now, let’s add some dynamics to our drum beat. We can automate the volume and panning of individual drum tracks to create a more interesting and engaging listening experience. Automation lanes are typically graphical lines that run parallel to the MIDI editor or audio track, allowing you to draw in changes to parameters over time. For example, to automate the volume, we’d draw a line that gradually increases the volume of the snare drum over the course of four bars, then gradually decreases it.
Similarly, we could automate the panning, moving the snare drum slightly from left to right and back again. This subtle movement adds a sense of space and depth to the track. The automation lane displays the parameter value over time, making it easy to visualize and edit these changes.
Using MIDI Controllers
MIDI controllers provide a hands-on approach to sequencing and automation. These devices, ranging from simple keyboards to complex control surfaces, send MIDI data to the DAW, allowing for real-time control over various parameters. A MIDI keyboard can be used to input notes and melodies directly, while more advanced controllers can control volume, panning, effects parameters, and much more.
Using a MIDI controller allows for a more expressive and intuitive workflow, especially during live performances or improvisational sessions. The tactile feedback of physical controls can significantly enhance the creative process, offering a different feel compared to using a mouse and keyboard. Many professional musicians use MIDI controllers for this very reason – the intuitive and expressive control they provide.
Mixing and Mastering Basics
Okay, so you’ve got your killer tracks recorded, edited, and all your MIDI is perfectly sequenced. Now comes the fun part: making it all sound amazing! Mixing and mastering are crucial steps in the music production process, and while they might seem similar, they’re actually quite different. This section will cover the fundamentals of mixing, focusing on the core techniques you’ll need to get a great-sounding mix.
Mastering will also be briefly touched upon to highlight its key differences from mixing.
Basic Mixing Setup: EQ, Compression, and Reverb
Mixing is the art of balancing and shaping the individual sounds in your project to create a cohesive and well-balanced final product. A good starting point involves using three essential tools: EQ (equalization), compression, and reverb. Here’s a step-by-step approach to setting up a basic mix using these tools:
- Gain Staging: Before touching any EQ, compression, or reverb, set your fader levels. Aim for a comfortable level, avoiding clipping (distortion). This prevents unwanted noise and maximizes headroom.
- EQ: Use EQ to sculpt the frequency response of each track. For example, you might cut some low-end muddiness from a guitar track to give it more clarity, or boost the high frequencies of a vocal to make it sit better in the mix. Focus on creating space between instruments; don’t let frequencies clash.
- Compression: Compression controls the dynamic range of a track. It reduces the difference between the loudest and quietest parts, making the track sound more even and punchy. Use compression subtly – too much can make a track sound lifeless. A common application is on drums or vocals to even out their dynamic range.
- Reverb: Reverb adds ambience and depth to a track. It simulates the sound of a space, creating a sense of realism and atmosphere. Use different reverb types and settings to achieve different effects. For example, a short, bright reverb might be suitable for a snare drum, while a longer, more spacious reverb could work well on vocals.
- Panning: Place your instruments in the stereo field. Panning instruments to the left and right creates a wider, more interesting soundscape. Experiment with different panning positions to achieve the best stereo image.
Gain Staging’s Importance in Mixing
Gain staging is the process of setting appropriate levels at each stage of your signal chain. This practice is vital because it impacts the overall mix’s dynamics and prevents clipping, which introduces distortion. Properly setting gain levels ensures that your signal is strong enough to be heard without being too loud and causing distortion. Poor gain staging can lead to a weak, lifeless mix, while good gain staging provides a solid foundation for your mix, allowing you to use effects like compression and EQ more effectively without causing unwanted artifacts.
Mixing Versus Mastering
Mixing and mastering are distinct processes with different goals. Mixing focuses on balancing individual tracks within a song to create a cohesive whole. Mastering, on the other hand, is the final stage of audio production, where the entire mixed song is optimized for playback across various systems. Mixing aims for a balanced and well-defined sound within the context of the song itself, while mastering aims for a consistent and optimized sound across different playback environments.
Mastering engineers focus on the overall loudness, dynamic range, stereo imaging, and frequency balance of the entire track to ensure it translates well on various playback systems, from car stereos to high-end headphones.
DAW-Specific Features

Okay, so we’ve covered the basics of DAWs. Now let’s dive into some of the cool, unique features that make certain DAWs stand out from the crowd. We’ll focus on Studio One and Reason, highlighting what makes them tick.
Studio One’s Unique Features, Daw
Studio One boasts several features that set it apart. Its intuitive drag-and-drop workflow, powerful arrangement tools, and integrated mastering capabilities are just a few examples. The following table compares some key differentiators:
| Feature | Studio One | Other DAWs (General Comparison) |
|---|---|---|
| Scratchpad | Allows for quick experimentation and idea sketching without affecting the main project. Think of it as a virtual notepad for audio and MIDI. | Many DAWs offer similar functionality, but Studio One’s implementation is particularly streamlined and integrated. |
| Arranger Track | Provides non-destructive editing capabilities for sections and arrangements. Easily move, copy, and rearrange parts of your song without affecting the underlying audio. | Some DAWs have similar features, but Studio One’s Arranger Track is often praised for its user-friendliness and power. |
| Integrated Mastering Suite | Includes a powerful mastering section with tools for finalizing your mixes. This saves time and money by reducing the need for separate mastering software. | Most DAWs require external mastering plugins or software. |
| Sound Variations | Offers a unique approach to sound design, allowing for quick and easy manipulation of existing sounds. | Other DAWs may have similar functionality, but Sound Variations is unique in its implementation within Studio One’s workflow. |
Reason’s Built-in Synthesizers and Effects
Reason’s strength lies in its powerful, integrated rack of virtual synthesizers and effects. Unlike many DAWs that rely heavily on third-party plugins, Reason’s built-in instruments and effects are renowned for their quality and ease of use. This integrated approach fosters a highly creative and efficient workflow. For instance, Reason’s Subtractor synth is a classic example of a versatile subtractive synthesizer that’s easy to learn yet capable of creating a wide range of sounds, from lush pads to aggressive leads.
Similarly, its effects, like the RV-7000 digital reverb, provide high-quality processing without the need for external plugins. The integrated nature means less latency and a more seamless creative process. The inherent modularity also allows for complex signal routing and patching, opening doors for unique sound design possibilities.
Creating a Complex Orchestral Arrangement Using a Sampler
Creating a complex orchestral arrangement with a sampler involves several steps. First, you’d load your orchestral samples into the sampler. Many samplers offer sophisticated features like key-switching and velocity layers to enhance realism. Then, you’d create MIDI tracks for each instrument section (strings, brass, woodwinds, percussion, etc.). You would program MIDI notes to represent the notes and rhythms of your arrangement.
This process might involve using multiple MIDI tracks for different articulations within a section (e.g., different bowing techniques for strings). The next step would involve layering these instruments. You might add multiple string samples to create a fuller sound. Finally, you would mix and master the arrangement, paying close attention to balancing the different instrument sections and achieving the desired sonic texture.
Consider using a DAW with powerful routing capabilities to handle the complexity of a large orchestral arrangement. For example, using aux sends to create submixes for each section allows for more precise control over the overall mix. A DAW with a robust automation system is also crucial for adding subtle dynamic changes and shaping the sonic landscape.
Collaboration and Sharing

So, you’ve crafted your masterpiece in your DAW. Now what? Getting your music out there, or even just collaborating with others, requires knowing how to export and share your work effectively. This section covers exporting audio in various formats and the best ways to collaborate and share projects across different DAWs.
Audio File Export Formats
Exporting your audio is the first step to sharing your work. Different formats cater to different needs. WAV files are uncompressed, maintaining the highest audio quality, but they are large file sizes. MP3s, on the other hand, are compressed, resulting in smaller file sizes, ideal for online sharing, but with some loss of audio quality. Other formats like AIFF and FLAC offer various compromises between file size and quality.
The choice depends on your intended use – if you’re sending a final mix to a mastering engineer, WAV is the way to go. If you’re uploading to a streaming platform, MP3 is generally preferred. Your DAW’s export settings will usually allow you to specify the bit depth (16-bit or 24-bit) and sample rate (44.1kHz, 48kHz, 96kHz, etc.) which also impact file size and quality.
Higher bit depth and sample rate mean better quality but larger files.
Collaboration Methods
Collaborating on music projects can be a blast, but it requires a streamlined workflow. One common approach is to work on separate sections of a song. For example, one collaborator could focus on the drums, another on the bassline, and a third on the melodies. Once individual tracks are completed, they can be exported and shared (usually as WAV files) and then imported into a central project.
Cloud-based collaboration platforms are becoming increasingly popular. These platforms allow multiple users to access and edit a project simultaneously, similar to Google Docs for music. This allows for real-time feedback and collaborative editing. Alternatively, you can use a version control system like Git (although this is more commonly used for code, it’s adaptable to audio files) to track changes and manage different versions of the project.
Careful communication and a clearly defined workflow are essential regardless of the chosen method.
Sharing Project Files Between DAWs
Sharing project files directly between different DAWs (like moving a Pro Tools project to Ableton Live) is often problematic. DAWs use different file formats and internal structures. The most reliable method is to export all individual tracks (stems) as WAV or AIFF files. These can then be imported into the target DAW, preserving audio quality and allowing for further editing or mixing.
While some DAWs offer import capabilities for other DAW’s project files, this often results in compatibility issues and can lead to missing plugins or altered settings. Sticking to the stems approach is the safest and most widely compatible solution. It also provides the most flexibility for collaborators using different DAWs.
Advanced Techniques
Alright, we’ve covered the basics, now let’s dive into some seriously cool stuff that’ll take your productions to the next level. We’re talking about techniques that pro mixers and producers use to add punch, polish, and overall awesomeness to their tracks. Get ready to level up your DAW game!
Sidechaining for Pumping Basslines
Sidechaining is a dynamic processing technique where the volume of one audio track (usually a bassline) is controlled by the level of another track (often a kick drum). This creates that signature “pumping” effect, where the bass ducks down slightly whenever the kick hits, then swells back up. It’s a super effective way to make your bassline sit perfectly in the mix without muddying it up.
To achieve this, you’ll route the kick drum’s audio to a compressor on the bassline. In your DAW, you’ll typically find a “sidechain” input or setting on your compressor. Experiment with the attack and release times of the compressor to find the perfect pumping rhythm. A fast attack will make the bass duck quickly, while a slower release will create a more gradual swell.
Too fast of a release can lead to a choppy sound, while too slow of a release can make the bass feel sluggish. The ratio setting on the compressor controls how much the bass ducks; a higher ratio creates a more pronounced pumping effect.
Parallel Processing
Parallel processing involves creating a duplicate of an audio track and applying different effects to the copy. Then, you blend the processed signal back in with the original, creating a richer, more complex sound. Think of it like this: you’re not just changing the sound of your track, you’re adding to it. A common example is using parallel compression on drums.
You might process one copy with heavy compression to create punch and another copy with light compression to retain dynamics. Then, carefully blending these two tracks together creates a drum sound that is both powerful and full of life. Another example is using parallel distortion, adding subtle harmonic richness without making the track sound harsh or overly processed. This technique allows for a creative exploration of different sonic textures without affecting the original sound.
Optimizing DAW Performance and Reducing Latency
Latency, that annoying delay between playing a note and hearing it, can be a real pain. But there are ways to minimize it. First, make sure your audio interface drivers are up to date. Outdated drivers are a common culprit of high latency. Next, close any unnecessary applications running in the background.
Your computer’s resources are precious, so freeing up some RAM and CPU power can make a huge difference. Consider lowering the buffer size in your audio interface settings, but be warned: this can increase CPU load, potentially leading to crackles and pops. Find the sweet spot between low latency and stable performance. Finally, consolidating and freezing tracks can significantly reduce the processing load on your DAW, freeing up resources for smoother playback.
Freezing renders the audio to a new track, removing the need to process the original plugins. It’s a great way to save CPU when working with complex projects.
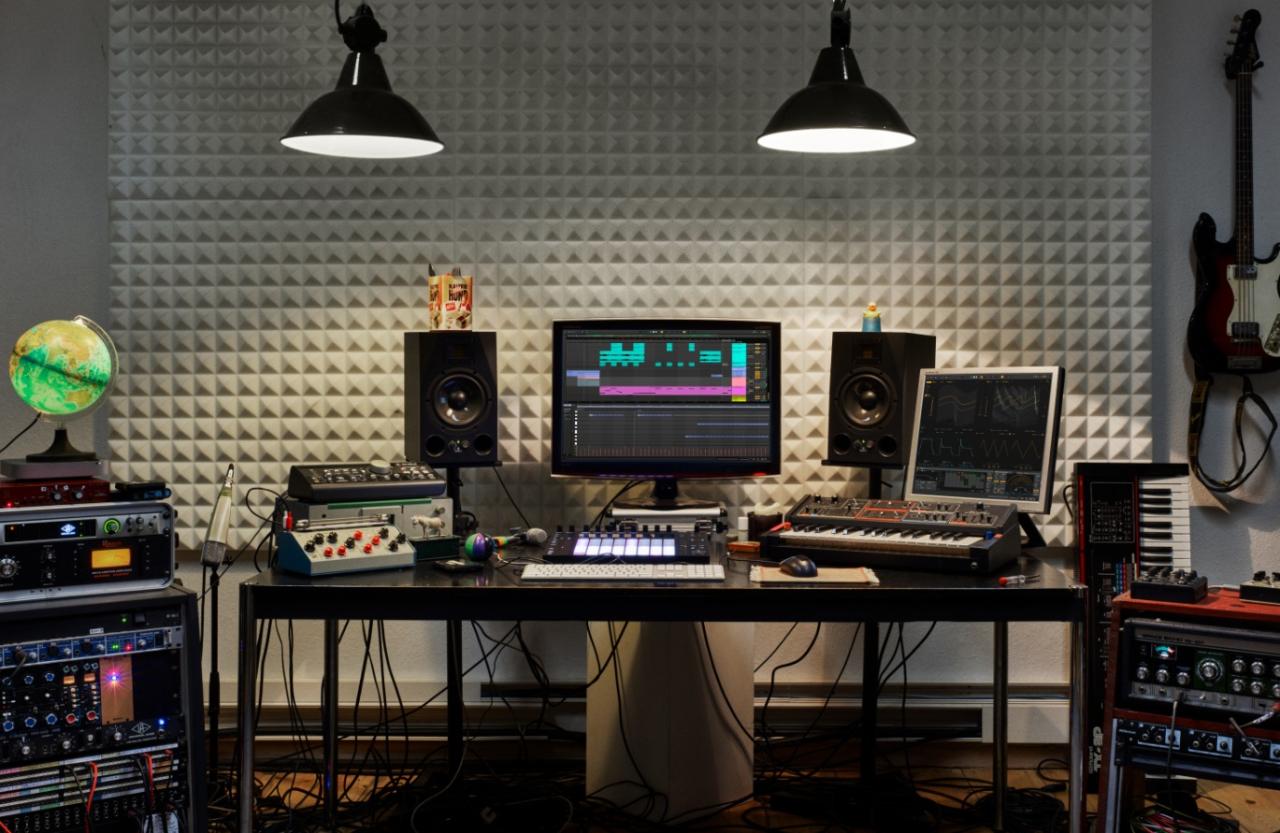
DAW Hardware Integration
Okay, so we’ve covered the software side of things pretty extensively. Now let’s dive into the hardware that makes your DAW sing (or scream, depending on your genre!). Choosing the right hardware can dramatically impact your workflow and sound quality. Think of it as upgrading your car’s engine – the software is the driver, but the hardware is what makes the whole thing go.
Audio Interface Comparison
Selecting an audio interface is crucial for capturing high-quality audio and integrating external gear into your DAW. The right interface will depend on your needs, budget, and the number of inputs/outputs required. Here’s a comparison of a few popular options:
| Interface | Inputs/Outputs | Preamp Quality | Price Range |
|---|---|---|---|
| Focusrite Scarlett 2i2 | 2 in / 2 out | Good, clean preamps suitable for most applications. | $150 – $200 |
| Universal Audio Apollo Twin | 2 in / 2 out (various models available with more I/O) | Excellent, known for their rich and detailed sound, often described as having a “vintage” feel. Uses UAD plugins for processing. | $800 – $2000+ |
| PreSonus AudioBox iTwo | 2 in / 2 out | Solid preamps at a very affordable price point. | $100 – $150 |
| MOTU 828x | 8 in / 8 out (various models available with more I/O) | High-quality preamps, excellent for larger setups and professional use. | $1500 – $2500+ |
Note: Prices are approximate and can vary based on retailer and sales. This table highlights a small selection; many other excellent interfaces are available.
MIDI Keyboard Controller Benefits
Using a MIDI keyboard controller offers significant advantages when working with MIDI data in your DAW. It provides a much more intuitive and expressive way to input notes, compared to using a computer mouse or keyboard.The tactile feedback and familiarity of a keyboard greatly improves workflow, especially for tasks like composing melodies, creating drum patterns, or playing virtual instruments.
Different controllers offer varying key actions, velocity sensitivity, and pitch bend/modulation wheels, allowing for a personalized playing experience. Many controllers also include knobs and faders for controlling plugins and mixing parameters in real-time, streamlining the production process. For example, a musician can easily record a piano part directly into their DAW with the expressiveness of a real keyboard, rather than meticulously clicking in notes.
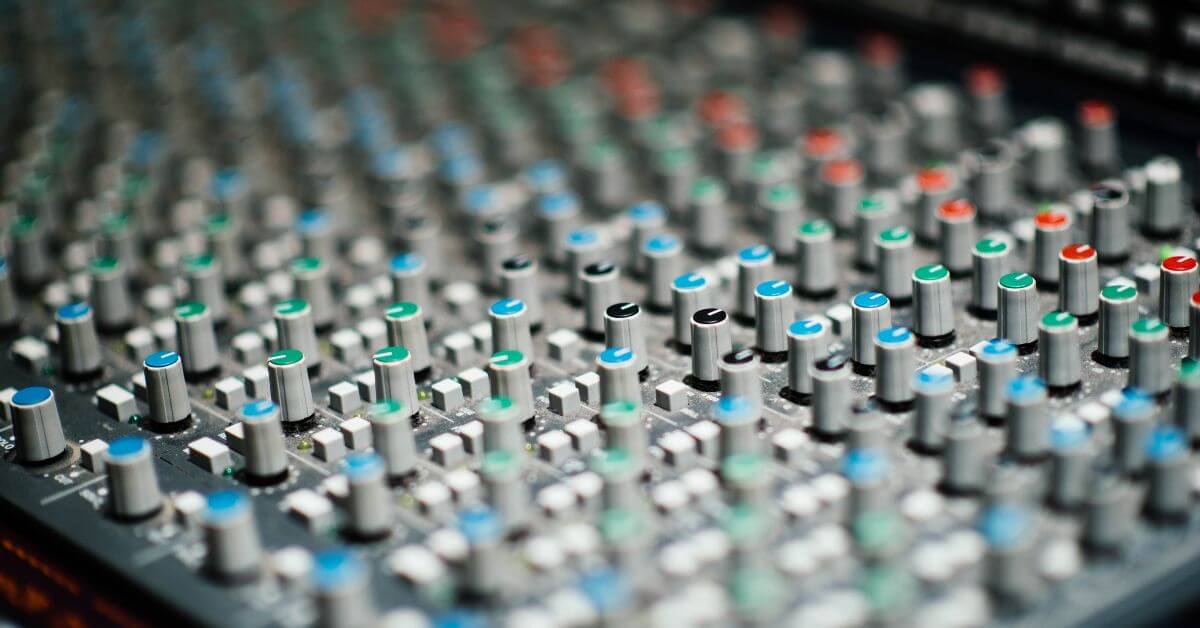
DAW and Dedicated Mixing Console Configuration
Integrating a dedicated mixing console with your DAW expands your creative possibilities and allows for more hands-on control over your mix. The setup involves routing audio signals from the console’s outputs to your DAW’s inputs via your audio interface.This often involves using ADAT or other digital connections for multiple channels. The specific configuration will depend on your console and interface capabilities.
It’s important to ensure proper signal routing and gain staging to prevent clipping or noise issues. Many modern consoles offer digital integration features that simplify this process. For instance, a large-format mixing console can be used for pre-fader monitoring and mixing, sending the final mixed signal to the DAW for further processing, mastering, and archiving. This setup is commonly found in professional recording studios.
Ending Remarks
So, there you have it – a whirlwind tour through the world of Digital Audio Workstations! From understanding the core functionalities of different DAWs to mastering advanced techniques like sidechaining and parallel processing, we’ve covered a lot of ground. Remember, the key to mastering a DAW is practice and experimentation. Don’t be afraid to dive in, explore different workflows, and find what works best for your creative process.
The possibilities are endless – so get out there and make some noise!
Clarifying Questions
What DAW is best for beginners?
There’s no single “best” DAW, but Ableton Live and GarageBand are often recommended for beginners due to their intuitive interfaces and user-friendly workflows.
How much does a DAW cost?
DAW pricing varies widely. Some offer free versions with limited features, while others have subscription models or one-time purchase options, ranging from under $100 to several hundred dollars.
Do I need a powerful computer to run a DAW?
While basic DAWs can run on less powerful machines, more demanding projects (especially those involving many plugins or high-resolution audio) require a computer with a decent processor, ample RAM, and a fast storage drive.
What’s the difference between a DAW and a music sequencer?
While some overlap exists, DAWs are more comprehensive, offering recording, editing, mixing, and mastering capabilities, whereas music sequencers primarily focus on MIDI sequencing and composition.
Can I use a DAW on a tablet or phone?
Yes, many DAWs offer mobile apps or have simplified versions designed for tablets and phones, although their functionality might be more limited than their desktop counterparts.