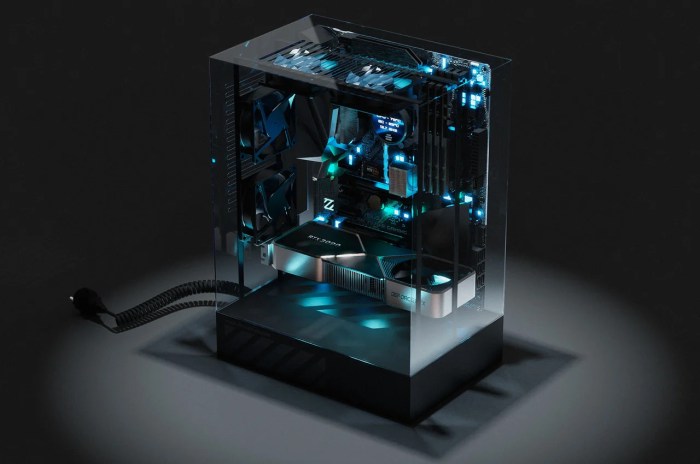
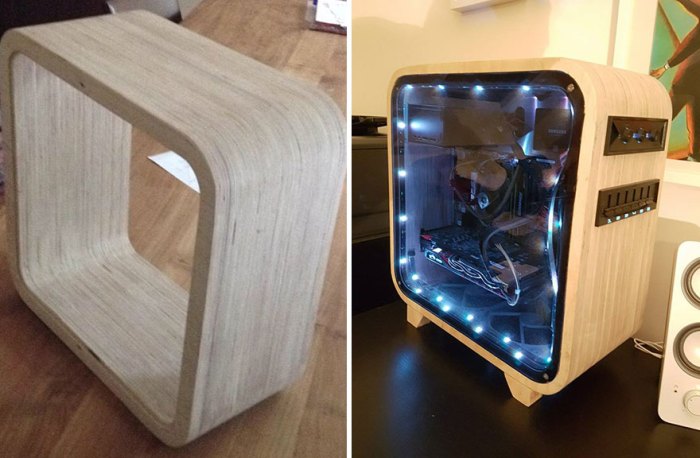
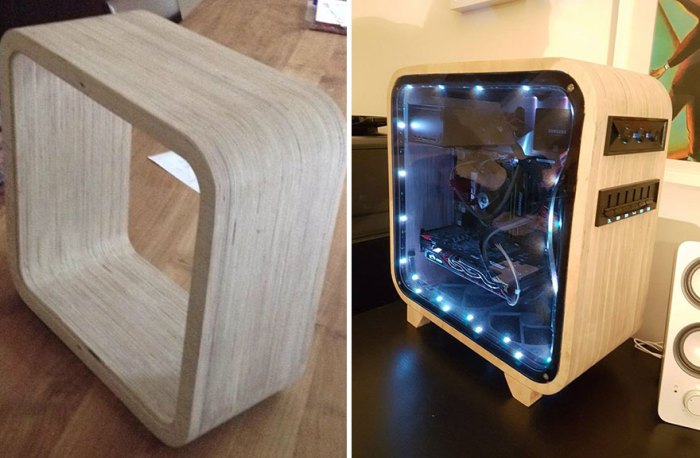
DIY CPU cases offer a unique opportunity to craft a custom-built PC that reflects your individual style and needs. Beyond the aesthetic appeal, building your own case unlocks the potential for unparalleled performance, tailored cooling solutions, and a deeper understanding of your computer’s inner workings.
From selecting the right materials to mastering intricate assembly techniques, the journey of creating a DIY CPU case is a rewarding one. You’ll gain valuable skills in fabrication, design, and problem-solving, all while constructing a truly unique and functional piece of technology.
Introduction to DIY CPU Cases
Building your own computer case is a rewarding experience that allows you to create a unique and personalized PC. It offers the freedom to design and construct a case that perfectly meets your specific needs and aesthetic preferences. This is a great way to express your creativity and technical skills while creating a high-performance system.
Benefits of DIY CPU Cases
Building your own CPU case offers several advantages over commercially available options:
- Customization: You have complete control over the design, size, and materials used, enabling you to tailor the case to your specific requirements. This includes choosing the desired form factor, layout, and features, such as ventilation, cable management, and aesthetic elements.
- Cost-Effectiveness: Building your own case can often be more affordable than purchasing a pre-built option, especially when considering the high prices of premium or custom cases. You can source materials from various vendors and choose components based on your budget.
- Improved Cooling: By designing your case, you can optimize airflow and ventilation, which is crucial for maintaining optimal temperatures and system stability, particularly for high-performance PCs. You can strategically place fans and incorporate custom cooling solutions to ensure efficient heat dissipation.
- Unique Aesthetics: DIY cases allow you to express your individual style and create a truly unique PC. You can choose colors, materials, and design elements that reflect your personality and preferences, making your system stand out from the crowd.
Challenges of DIY CPU Cases
While building your own CPU case is rewarding, it also presents certain challenges:
- Technical Expertise: Constructing a case requires a certain level of technical knowledge and experience. You need to be comfortable with basic tools and techniques, as well as understanding the principles of PC building and case design.
- Time Commitment: Building a custom case takes time and effort. You need to plan the design, source materials, and carefully assemble the components, which can be a time-consuming process, especially for complex designs.
- Material Sourcing: Finding the right materials and components for your case can be challenging. You may need to research and compare options from various vendors, ensuring compatibility and quality.
- Potential for Errors: As with any DIY project, there is a risk of making mistakes during the building process. Careful planning, attention to detail, and proper execution are essential to avoid issues that could affect the functionality or aesthetics of the case.
Design Considerations

Designing a DIY CPU case involves careful consideration of functionality and aesthetics. You need to balance the practical aspects of cooling, cable management, and component accessibility with the visual appeal of the finished product.
Airflow and Thermal Management
Airflow and thermal management are crucial for a functional CPU case. Proper airflow ensures that hot components, like the CPU and GPU, are adequately cooled, preventing overheating and potential damage.
- Placement of Fans: Fans should be strategically placed to create a positive airflow pattern, drawing cool air into the case and expelling hot air. Common configurations include front intake fans, rear exhaust fans, and top exhaust fans.
- Fan Size and Speed: The size and speed of fans directly affect airflow. Larger fans generally move more air at lower RPMs, resulting in quieter operation and potentially better cooling. However, smaller fans can be more efficient in tight spaces.
- Case Design: The case design itself plays a significant role in airflow. Open-frame cases or cases with large vents and mesh panels provide better ventilation. Closed cases may need more powerful fans to maintain adequate airflow.
Cable Management
Efficient cable management is essential for a clean and organized build. A well-managed cable system improves airflow, reduces clutter, and enhances the overall aesthetics of the case.
- Cable Routing: The case should provide sufficient space and channels for routing cables neatly and securely. Use cable ties, zip ties, or Velcro straps to keep cables organized and prevent them from obstructing airflow.
- Cable Management Features: Some cases include built-in features to aid cable management, such as cable routing holes, dedicated cable channels, or even integrated cable combs.
- Modular Power Supplies: Modular power supplies (PSUs) allow you to connect only the cables you need, reducing clutter and improving airflow. They also make it easier to swap components and upgrade the PSU later.
Innovative Design Features
Innovative design features can enhance the user experience and create a more enjoyable building and usage experience.
- Tool-less Installation: Cases with tool-less drive bays, fan mounts, and expansion slots make component installation and removal faster and easier.
- Integrated Lighting: Some cases feature integrated RGB lighting, allowing you to customize the look of your build. Others provide mounting points for LED strips for even more personalization.
- Removable Side Panels: Removable side panels make it easier to access components for maintenance or upgrades, and can also be used to showcase your build. Some cases have tempered glass side panels for a more premium look.
- Dust Filters: Dust filters help keep the interior of your case clean, protecting components from dust buildup and improving airflow. Filters can be located in various areas, including the front, top, and bottom of the case.
Component Installation: Diy Cpu Case

Installing components in your custom PC case is a crucial step in the building process. This section will guide you through the process of installing essential components like the motherboard, CPU, RAM, and storage drives. We will also discuss how to connect cables and ensure proper functionality.
Installing the Motherboard
The motherboard is the heart of your PC, connecting all the components. Here’s how to install it:
- Prepare the Case: Ensure the case is placed on a flat, stable surface. Remove any unnecessary components or brackets that may obstruct the motherboard installation.
- Locate the Motherboard Standoffs: The case will have standoffs, which are small plastic or metal posts designed to lift the motherboard slightly above the case’s bottom. These standoffs are crucial to prevent short circuits.
- Align the Motherboard: Carefully align the motherboard with the standoffs. The motherboard’s I/O panel should be facing the back of the case.
- Secure the Motherboard: Once aligned, gently press down on the motherboard to ensure it sits firmly on the standoffs. Use the case’s provided screws to secure the motherboard in place. Be careful not to overtighten the screws.
Installing the CPU
The CPU, or central processing unit, is the brain of your computer. Here’s how to install it:
- Open the CPU Socket: Locate the CPU socket on the motherboard. It’s usually a square or rectangular opening with a lever or a latch. Unlock the socket by releasing the lever or latch.
- Align the CPU: Carefully remove the CPU from its packaging and align the arrow or notch on the CPU with the corresponding mark on the socket.
- Install the CPU: Gently place the CPU into the socket. Ensure it sits flush and makes contact with the pins. Close the lever or latch to secure the CPU.
- Install the CPU Cooler: The CPU cooler, usually a fan and heatsink assembly, is essential for dissipating heat generated by the CPU. Refer to the cooler’s manual for specific installation instructions.
Installing RAM
RAM, or random access memory, is used by the computer to store data and programs that are actively being used. Here’s how to install it:
- Locate the RAM Slots: RAM slots are usually located near the CPU socket on the motherboard. They are typically black or blue in color.
- Open the RAM Clips: Each RAM slot has clips that hold the RAM module in place. Open these clips by gently pressing them down.
- Align the RAM Module: Align the notch on the RAM module with the corresponding notch on the RAM slot.
- Insert the RAM Module: Gently push down on the RAM module until it clicks into place. Close the clips to secure the RAM module.
Installing Storage Drives
Storage drives, such as hard disk drives (HDDs) or solid-state drives (SSDs), store your operating system, programs, and files. Here’s how to install them:
- Locate the Drive Bays: The case will have drive bays, which are slots designed to hold storage drives. They are usually labeled with numbers or letters.
- Install the Drive: Slide the drive into the drive bay, ensuring it’s properly aligned. Use the case’s screws to secure the drive in place.
- Connect the Drive: Connect the drive to the motherboard using the appropriate data cable (SATA for most modern drives) and power cable.
Connecting Cables
Once you’ve installed the components, you need to connect them using various cables. Here’s a general overview:
- Power Supply Cables: The power supply unit (PSU) provides power to all components. Connect the appropriate cables from the PSU to the motherboard, storage drives, and other components.
- Data Cables: Data cables, such as SATA cables, transfer data between components. Connect the appropriate cables from the motherboard to the storage drives.
- Front Panel Connectors: The front panel of the case has connectors for buttons, LEDs, and other features. Refer to the motherboard manual for specific instructions on connecting these connectors.
Troubleshooting Common Installation Issues
- No Power: If your PC doesn’t power on, check the power supply, power switch connections, and the power cord.
- No Display: If you don’t see a display, check the monitor connection, the graphics card, and the RAM.
- Beeping Sounds: Beeping sounds usually indicate a problem with the motherboard, RAM, or other components. Refer to the motherboard manual for specific beep codes.
- Overheating: If the CPU or other components are overheating, check the CPU cooler, fan connections, and airflow in the case.
Cable Management and Organization
A clean and organized cable management system is crucial for both the aesthetic appeal and the functionality of your DIY CPU case. Properly routed and secured cables not only improve airflow and prevent overheating, but also contribute to a more professional and polished look.
Cable Management Techniques
Effective cable management involves organizing and routing cables efficiently to minimize clutter and optimize airflow. Here are some key techniques:
- Cable Ties: These versatile fasteners are widely used for bundling and securing cables. They come in various sizes and materials, allowing you to choose the best option for different cable types and thicknesses.
- Velcro Straps: Velcro straps offer a reusable and adjustable solution for managing cables. They are particularly useful for grouping cables and attaching them to components or case walls.
- Zip Ties: Similar to cable ties, zip ties provide a secure way to bundle cables. They are typically made of nylon and offer a variety of sizes and colors.
- Cable Sleeves: Cable sleeves provide a neat and protective covering for cables, enhancing the overall appearance while also reducing the risk of snags or damage.
Cable Management Accessories
A range of specialized accessories can enhance your cable management efforts:
- Cable Combs: These plastic combs help organize and separate cables, making it easier to route them neatly through your case.
- Cable Clips: Cable clips offer a convenient way to attach cables to components or case walls, keeping them organized and secure.
- Cable Sleeves: Cable sleeves provide a neat and protective covering for cables, enhancing the overall appearance while also reducing the risk of snags or damage.
- Cable Channels: These channels provide dedicated pathways for cables, helping to keep them organized and hidden from view.
- Cable Organizers: These organizers offer a variety of compartments and slots for storing and managing cables, keeping them tidy and easily accessible.
Embarking on a DIY CPU case project allows you to transcend the limitations of commercially available options, unleashing your creativity and technical prowess. Whether you’re a seasoned PC builder or a curious newcomer, the journey of constructing your own case promises a fulfilling experience that blends innovation, craftsmanship, and a deep appreciation for the art of computer hardware.
Building a DIY CPU case can be a fun and rewarding project, especially if you enjoy the process of customizing your setup. Similar to the satisfaction of completing a DIY kitchen reno , you’ll have a sense of accomplishment seeing your vision come to life. Just remember to consider the cooling requirements of your components when designing your case, ensuring proper airflow for optimal performance.

