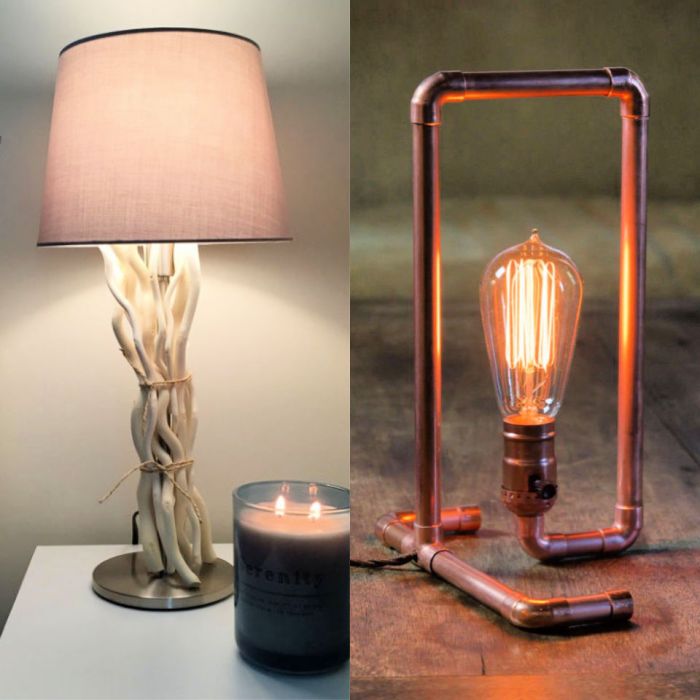
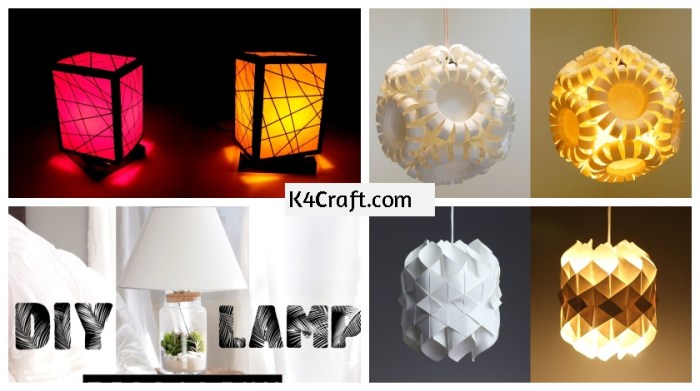
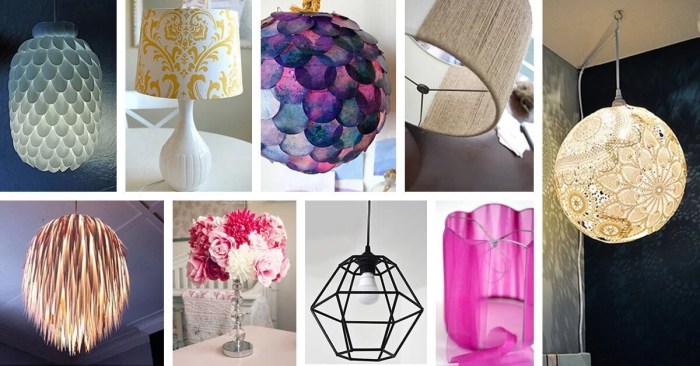
DIY lamp ideas set the stage for transforming your home into a haven of personalized illumination. From repurposing everyday objects to crafting unique designs, the possibilities are endless. Whether you’re a seasoned crafter or a curious beginner, this guide will illuminate the path to crafting your own distinctive lighting fixtures.
Explore a world of materials, tools, and techniques that empower you to create lamps that reflect your personal style and enhance the ambiance of your living spaces. From the foundational elements of lamp construction to the intricacies of electrical wiring, we’ll guide you through each step, ensuring a safe and rewarding DIY experience.
Materials and Tools

Creating your own lamp can be a rewarding and creative project, allowing you to personalize your space with unique lighting. To embark on this DIY journey, you’ll need a range of materials and tools, depending on the design and complexity of your lamp.
The materials and tools you’ll need for your DIY lamp project will vary depending on the specific design you choose.
Materials
The materials you choose will determine the overall look and feel of your lamp. Here’s a list of common materials used in DIY lamp projects:
- Wood: A versatile material that can be used to create lamp bases, shades, and even entire lamp structures. Choose from different types of wood, such as pine, oak, or walnut, depending on the desired aesthetic and durability.
- Metal: Another versatile material, metal can be used for lamp bases, shades, and decorative accents. Metals like copper, brass, iron, and steel offer various colors and finishes.
- Glass: Used for lampshades, globes, and decorative elements, glass adds a touch of elegance and sophistication. Consider using clear glass for a modern look or colored glass for a more vintage vibe.
- Fabric: Fabric is often used to cover lampshades, creating a warm and inviting atmosphere. Choose from a wide range of fabrics, including cotton, linen, silk, and velvet, depending on your desired style and texture.
- Plastic: A lightweight and affordable material, plastic can be used for lampshades, bases, and other decorative elements. Consider using acrylic or polycarbonate for a modern and durable finish.
- Ceramic: A durable and elegant material, ceramic can be used for lamp bases, shades, and decorative accents. Choose from a wide variety of colors and patterns to suit your style.
- Concrete: A unique and industrial material, concrete can be used for lamp bases and other decorative elements. Experiment with different textures and finishes to create a unique look.
- Electrical Components: Essential for making your lamp functional, these components include a lamp socket, electrical cord, wire, switch, and bulb.
Tools
The tools you’ll need for your DIY lamp project will depend on the specific design and materials you choose. Here are some essential tools:
- Saws: Used for cutting wood, metal, and plastic. Choose from a variety of saws, including a handsaw, circular saw, or jigsaw, depending on the materials and cuts required.
- Drills: Used for drilling holes in wood, metal, and plastic. Choose from a variety of drill bits, including wood bits, metal bits, and plastic bits, depending on the material you are drilling.
- Wire Strippers: Used for stripping insulation off electrical wires, making it easier to connect wires to the lamp socket and switch.
- Soldering Iron: Used for connecting electrical wires, ensuring a secure and reliable connection. Use a soldering iron with the appropriate tip size and temperature for the type of wires you are working with.
- Glue Gun: Used for attaching materials like fabric, paper, or plastic to lampshades or bases. Choose a glue gun with a high-temperature setting for stronger bonds.
- Measuring Tape: Essential for accurately measuring materials and components before cutting or assembling your lamp.
- Screwdriver: Used for attaching components like the lamp socket, switch, and base to the lamp structure.
- Pliers: Used for gripping and bending metal, wire, or other materials during assembly.
- Sandpaper: Used for smoothing rough edges and surfaces on wood, metal, or plastic. Choose from a variety of grit levels depending on the desired smoothness.
- Safety Glasses: Essential for protecting your eyes from flying debris and dust while working with tools.
- Work Gloves: Protect your hands from cuts, scrapes, and burns while working with tools.
Safety Precautions
Working with electricity and tools can be dangerous. Always prioritize safety and take the following precautions:
- Disconnect Power: Always disconnect the power to the electrical outlet before working on any electrical components.
- Use Proper Tools: Use the appropriate tools for the job and ensure they are in good working condition.
- Wear Safety Gear: Always wear safety glasses and work gloves to protect yourself from injury.
- Work in a Well-Ventilated Area: Work in a well-ventilated area to avoid inhaling dust or fumes from materials.
- Avoid Distractions: Focus on your work and avoid distractions that could lead to accidents.
- Keep Children and Pets Away: Keep children and pets away from the work area to prevent accidents.
- Follow Manufacturer Instructions: Always follow the manufacturer’s instructions for using tools and electrical components.
Lamp Base Ideas
The base of your lamp is a great opportunity to express your creativity and personalize your lighting fixture. There are countless ways to create a unique lamp base, from repurposing everyday items to designing a custom piece using 3D printing or crafting techniques.
Repurposed Items
Repurposing old items is a great way to give them new life and create a one-of-a-kind lamp base. Here are some ideas for repurposing items you might have around the house:
- Old Books: Stack several old books together to create a sturdy and stylish lamp base. You can use books of different sizes and colors to create a unique look. For added stability, consider using a small piece of wood or a metal plate as the base.
- Vintage Jars: Glass jars, especially vintage ones, can be transformed into charming lamp bases. You can use them as they are, or decorate them with paint, fabric, or other embellishments. Just make sure to choose a jar with a wide enough opening to accommodate the lamp’s cord.
- Salvaged Wood: A piece of salvaged wood, like a weathered plank or a tree stump, can make a rustic and organic lamp base. Sand the wood and seal it with a clear finish to protect it from moisture.
3D Printed Lamp Bases, Diy lamp ideas
3D printing allows you to create custom lamp bases with intricate designs and complex shapes. You can design your own lamp base using 3D modeling software or find pre-designed models online.
- Geometric Designs: Create a lamp base with geometric shapes like cubes, spheres, or pyramids. These shapes can be combined in various ways to create unique and modern designs.
- Organic Shapes: 3D printing allows you to create lamp bases with organic shapes, such as flowing curves, swirling patterns, or even realistic animal forms.
- Personalized Designs: You can personalize your lamp base by incorporating your initials, a special date, or a meaningful symbol into the design.
Minimalist Lamp Bases
Minimalist lamp bases focus on simplicity and clean lines. These bases are often made from materials like metal, wood, or concrete.
- Geometric Shapes: Simple geometric shapes like cylinders, cones, or cubes can create a minimalist and modern lamp base.
- Solid Colors: Choose a lamp base in a solid color that complements the surrounding decor. Neutral colors like black, white, or gray are popular choices for minimalist designs.
- Natural Materials: Natural materials like wood or stone can add a touch of warmth and texture to a minimalist lamp base.
Shade Options: Diy Lamp Ideas

Choosing the right lampshade can significantly impact the overall look and feel of your DIY lamp. From classic drum shades to more modern conical designs, a wide range of options exist, each with its unique characteristics and aesthetic appeal.
Fabric Lampshade Construction
Fabric lampshades are a popular choice due to their versatility and ease of customization. You can use a variety of fabrics, including cotton, linen, silk, or even recycled materials, to create a lampshade that complements your decor.
Fabric lampshades can be constructed using a variety of methods, including:
- Sewing: This method involves cutting and sewing fabric panels together to create the desired shape. You can use a sewing machine or hand-sew the panels, depending on your skill level and preference.
- Gluing: For a simpler approach, you can glue fabric onto a pre-made lampshade frame. This method is ideal for beginners and allows for quick and easy customization.
- Stapling: Similar to gluing, stapling fabric onto a lampshade frame is a relatively straightforward method. It’s essential to use a staple gun designed for fabric and ensure the staples are securely fastened.
Paper Lampshade Construction
Paper lampshades offer a lightweight and affordable alternative to fabric lampshades. You can use various types of paper, including parchment paper, tissue paper, or even old maps, to create unique and decorative lampshades.
Here are some methods for constructing paper lampshades:
- Paper Mache: This technique involves layering strips of paper soaked in paste onto a balloon or a mold. Once the paper mache dries, you can remove the balloon or mold and have a durable lampshade base.
- Origami: For a more intricate design, you can use origami techniques to fold and assemble paper lampshades. There are numerous online tutorials available for different origami lampshade designs.
- Paper Quilling: Paper quilling involves rolling and shaping thin strips of paper to create decorative patterns. You can use these patterns to embellish a paper lampshade or create the entire shade using quilled paper.
Other Materials
Beyond fabric and paper, you can use various other materials to create lampshades, including:
- Wire Mesh: Wire mesh can be bent and shaped to create unique and modern lampshades. You can cover the wire mesh with fabric or leave it exposed for an industrial look.
- Bamboo: Bamboo is a natural material that adds a touch of warmth and rustic charm to lampshades. You can weave bamboo strips together to create a lampshade or use bamboo sticks to form a frame.
- Recycled Materials: Get creative and use recycled materials like plastic bottles, cardboard boxes, or old magazines to create lampshades. This is an eco-friendly and budget-friendly option.
Wiring and Electrical Components

Wiring a lamp correctly is essential for both functionality and safety. Understanding the basics of lamp wiring and the roles of different components is crucial before you start assembling your DIY lamp.
Basic Lamp Wiring
The standard wiring for a lamp typically involves a few key components:
- Line Cord: The line cord connects the lamp to the power source (wall outlet). It usually has two wires: a hot wire (black) and a neutral wire (white). The hot wire carries the electrical current from the outlet, while the neutral wire carries the current back to the outlet.
- Switch: The switch controls the flow of electricity to the lamp. When the switch is turned on, the electrical circuit is completed, allowing current to flow to the bulb.
- Socket: The socket holds the light bulb and provides a connection for the electrical current to reach the bulb’s filament.
- Ground Wire (Green): The ground wire provides a path for electrical current to flow to the ground in case of a short circuit. This helps prevent electrical shock.
Step-by-Step Guide to Wiring a Lamp
Wiring a lamp safely and correctly requires attention to detail and adherence to electrical safety practices. Here’s a step-by-step guide:
- Gather Your Materials: Before starting, ensure you have all the necessary materials, including the lamp base, shade, bulb, wire, switch, socket, and any other components.
- Cut the Wire: Cut the wire to the appropriate length needed for your lamp. Leave enough slack for easy connection and movement.
- Strip the Wire: Strip the insulation off the ends of the wire using a wire stripper. Expose about ½ inch of wire for each connection.
- Connect the Wires to the Switch: Connect the hot wire (black) to the switch’s terminal marked “hot” or “line.” Connect the neutral wire (white) to the switch’s terminal marked “neutral” or “load.”
- Connect the Wires to the Socket: Connect the hot wire (black) to the socket’s terminal marked “hot” or “line.” Connect the neutral wire (white) to the socket’s terminal marked “neutral” or “load.”
- Connect the Ground Wire: If your lamp base has a ground wire, connect it to the socket’s ground terminal (usually green).
- Secure the Connections: Secure all wire connections with wire nuts. Ensure each wire nut has a secure connection to all wires it’s holding together.
- Assemble the Lamp: Once the wiring is complete, assemble the lamp according to your design.
- Test the Lamp: Before using the lamp, test it by plugging it into a wall outlet. Make sure the switch turns the light on and off without any issues.
Troubleshooting Common Electrical Problems
If your DIY lamp isn’t working as expected, it’s essential to troubleshoot the problem before using it. Here are some common electrical problems and their potential solutions:
- No Light: If the lamp doesn’t light up at all, check the following:
- Loose Connections: Ensure all wire connections are secure and tight.
- Burnt-Out Bulb: Replace the bulb with a new one.
- Faulty Switch: Test the switch by connecting a known working bulb to the socket. If the bulb doesn’t light, replace the switch.
- Flickering Light: If the lamp flickers, check the following:
- Loose Connections: Ensure all wire connections are secure and tight.
- Faulty Switch: Test the switch by connecting a known working bulb to the socket. If the bulb flickers, replace the switch.
- Faulty Socket: Test the socket by connecting a known working bulb to it. If the bulb flickers, replace the socket.
Style and Aesthetics
The style and aesthetics of your DIY lamp can make a significant impact on the overall look and feel of your space. You can choose from a wide range of design styles to create a lamp that complements your existing decor or introduces a new element to your home.
Design Styles
The design style of your lamp should align with the overall aesthetic of the room. Here are some popular design styles and their influence on lamp design:
- Modern: Modern lamps often feature clean lines, geometric shapes, and minimalist designs. They typically use materials like chrome, glass, and acrylic, creating a sleek and contemporary look.
- Rustic: Rustic lamps often incorporate natural elements like wood, leather, and metal. They can have a distressed or weathered look, adding warmth and character to a space.
- Industrial: Industrial lamps are inspired by industrial design and often feature exposed metal, Edison bulbs, and a utilitarian aesthetic. They can add a touch of urban chic to a room.
- Vintage: Vintage lamps often have a classic or retro look, featuring ornate details, patterned fabrics, and antique finishes. They can add a touch of elegance and nostalgia to a space.
Color, Texture, and Pattern
Color, texture, and pattern play a crucial role in creating a visually appealing lamp.
- Color: The color of your lamp can influence the mood of a room. Neutral colors like white, black, and gray can create a clean and modern look. Bold colors like red, blue, and green can add a pop of personality.
- Texture: The texture of your lamp can add depth and visual interest. You can use materials like wood, metal, fabric, or even natural elements like stone or shells to create different textures.
- Pattern: Patterns can add visual interest and personality to your lamp. You can use patterned fabrics for the lampshade, or incorporate patterned elements into the base or other components.
Mood Board
A mood board can help you visualize different lamp styles and aesthetics. Here are some examples of lamps that represent various design styles:
Modern lamp: A sleek, chrome floor lamp with a geometric shade made of frosted glass.
Rustic lamp: A wooden table lamp with a distressed finish and a fabric shade featuring a plaid pattern.
Industrial lamp: A metal floor lamp with an exposed bulb and a simple, utilitarian shade.
Vintage lamp: A ceramic table lamp with a floral pattern and a ruffled fabric shade.
Advanced DIY Lamp Projects
For those seeking a greater challenge and looking to push their crafting skills further, here are some advanced DIY lamp projects that will elevate your lighting game. These projects incorporate complex techniques, unique materials, and innovative features to create truly stunning and functional pieces.
Building a Multi-Functional Lamp
Creating a multi-functional lamp involves integrating several features into one design. This could include adjustable lighting levels, built-in charging stations, or even a speaker system.
Here are some ideas for multi-functional lamp projects:
- Adjustable Lighting Levels: You can create a lamp with multiple light sources that can be controlled independently. This allows for various lighting scenarios, from bright task lighting to soft ambient light. You can achieve this by using multiple LED strips or bulbs, each with its own dimmer switch.
- Built-in Charging Station: Incorporate a wireless charging pad or a USB port into the lamp base to charge your devices conveniently. This is a great way to combine functionality and aesthetics.
- Integrated Speaker System: Integrate a small speaker system into the lamp base to enjoy music while you work or relax. You can use a Bluetooth speaker or a wired system, depending on your preference.
With a dash of creativity and a touch of DIY spirit, you can illuminate your home with unique and personalized lighting solutions. From repurposed treasures to innovative designs, the journey of crafting your own lamps is a rewarding experience. So, gather your materials, embrace the process, and let your inner light designer shine.
DIY lamp ideas can be a fun and rewarding project, allowing you to personalize your space with unique lighting. While researching materials for your lamp, you might stumble upon information about medications like oxycodone 5mg , which is a powerful pain reliever and should only be used under the guidance of a medical professional. Remember, your DIY lamp project should focus on creativity and safety, so always prioritize using appropriate materials and following instructions carefully.

