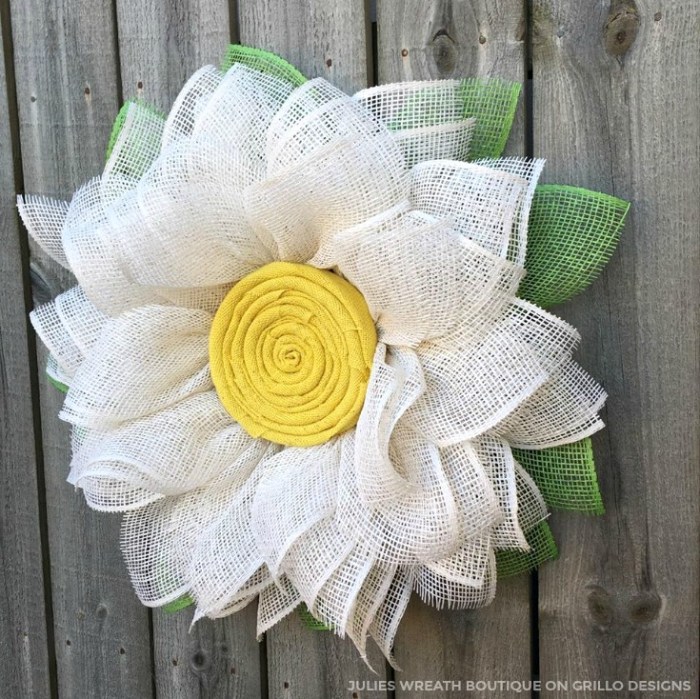
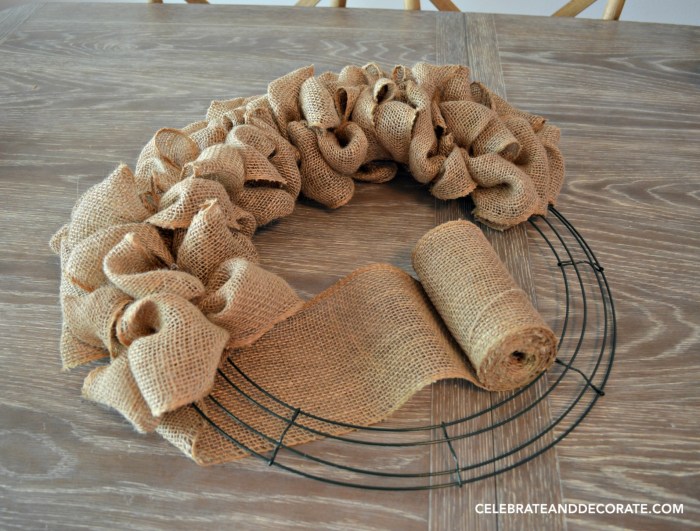
DIY burlap wreath opens the door to a world of rustic charm, allowing you to create beautiful and personalized decorations for any occasion. Burlap, with its natural texture and versatility, offers a unique canvas for crafting wreaths that exude warmth and character.
From simple and elegant to elaborate and festive, burlap wreaths can transform any space, adding a touch of rustic elegance to your home or as a thoughtful gift. This comprehensive guide will equip you with the knowledge and inspiration to create your own stunning burlap wreaths, exploring everything from essential supplies and techniques to creative design ideas and care tips.
Burlap Wreath Design Inspiration
Burlap wreaths offer a versatile and rustic charm that can be customized to suit any occasion. From spring’s delicate blooms to winter’s frosted elegance, there’s a burlap wreath design to match every season and style. Let’s explore some ideas for crafting beautiful and unique burlap wreaths.
Burlap Wreath Design Ideas
The beauty of burlap wreaths lies in their adaptability. They can be dressed up or down, making them suitable for a wide range of themes and occasions. Here are some examples of burlap wreath designs that highlight different styles, themes, and occasions:
- Rustic Farmhouse: A burlap wreath adorned with dried flowers, wheat stalks, and burlap ribbon creates a charming farmhouse aesthetic.
- Coastal Chic: Incorporate seashells, starfish, and nautical rope into a burlap wreath for a coastal-inspired look.
- Bohemian: Embrace earthy tones and natural textures with burlap wreaths featuring feathers, dried grasses, and macrame accents.
- Modern Minimalist: A simple burlap wreath with a single statement piece, like a large bow or a few sprigs of greenery, exudes a minimalist elegance.
Creating Burlap Wreaths for Specific Holidays and Seasons
Burlap wreaths can be easily transformed to celebrate specific holidays and seasons. Here’s how to create wreaths for different occasions:
| Occasion | Design Inspiration | Examples |
|---|---|---|
| Spring | Pastel colors, floral accents, and delicate greenery. | A burlap wreath with pastel-colored ribbon, silk flowers, and sprigs of lavender. |
| Summer | Vibrant colors, tropical elements, and nautical accents. | A burlap wreath with bright yellow and orange ribbon, pineapple slices, and seashells. |
| Fall | Warm colors, natural textures, and autumnal elements. | A burlap wreath with orange and brown ribbon, faux pumpkins, and fall leaves. |
| Winter | Metallic accents, wintery elements, and festive decorations. | A burlap wreath with silver or gold ribbon, pine cones, and a red bow. |
Creative Burlap Wreath Techniques

Once you’ve mastered the basics of crafting a burlap wreath, you can explore more advanced techniques to create truly unique and eye-catching pieces. These techniques allow you to experiment with different textures, colors, and materials, giving your wreaths a personalized touch.
Layered Burlap Textures
Adding different layers of burlap can create a visually appealing and textured wreath. You can experiment with different widths and colors of burlap to achieve a variety of looks. For instance, using a wider burlap ribbon for the base and a narrower one for accents can create a dimensional effect.
- Using multiple widths: A wider burlap ribbon can be used for the base of the wreath, while a narrower ribbon can be used for accents or embellishments. This creates a layered effect with different textures.
- Playing with color: You can combine different colors of burlap to create a vibrant and eye-catching wreath. For example, a natural burlap base can be accented with pops of red, green, or blue burlap ribbons.
Incorporating Fabric Scraps and Other Materials
Adding fabric scraps, ribbons, and other materials can add dimension and personality to your burlap wreath. You can use contrasting colors and textures to create visual interest. For instance, you can use lace, felt, or even old t-shirts to create unique embellishments.
- Using contrasting textures: Combine burlap with fabrics like lace, felt, or even burlap with different weaves to create a visually interesting and textured wreath.
- Adding natural elements: Incorporate natural elements like twigs, pine cones, or dried flowers to create a rustic and organic feel.
Using Stencils and Paints
Stencils and paints can be used to personalize your burlap wreath. You can use stencils to create patterns, designs, or even words on the burlap. You can use acrylic paint or fabric paint for a more permanent finish.
- Creating patterns: Stencils can be used to create simple geometric patterns or more elaborate designs on the burlap.
- Adding personalized touches: You can use stencils to create initials, names, or dates on the wreath.
Creating a Rustic Burlap Wreath with a Vintage Aesthetic
To achieve a rustic vintage aesthetic, use natural burlap, distressed wood, and vintage-inspired embellishments. You can also use a combination of natural elements like dried flowers, twigs, and berries.
- Distressing the burlap: You can distress the burlap by tearing the edges or rubbing it with sandpaper to create a worn and weathered look.
- Adding vintage embellishments: Use vintage buttons, lace, or ribbons to add a touch of old-world charm.
- Using natural elements: Incorporate natural elements like dried flowers, twigs, or berries to create a rustic and organic feel.
Burlap Wreath Care and Maintenance

Your burlap wreath is a beautiful addition to your home decor, but like any handmade item, it requires some care to ensure it stays looking its best. Proper care and maintenance will help preserve the beauty and longevity of your burlap wreath, ensuring it continues to brighten your space for years to come.
Storing and Displaying Your Burlap Wreath
Storing and displaying your burlap wreath correctly is essential for its preservation.
- Avoid placing your wreath in direct sunlight or extreme temperatures. Prolonged exposure to sunlight can cause the burlap to fade and weaken, while extreme temperatures can lead to warping or damage.
- When not in use, store your wreath in a cool, dry place. You can wrap it in tissue paper or a breathable fabric to protect it from dust and moisture.
- If you’re hanging your wreath outdoors, make sure to use a weather-resistant hanger. You can also consider applying a sealant to the burlap to protect it from the elements.
Cleaning and Refreshing Your Burlap Wreath
Over time, your burlap wreath may accumulate dust or debris. Here are some tips for cleaning and refreshing it:
- For a light dusting, use a soft-bristled brush or a vacuum cleaner with a brush attachment. Gently brush away any dust or debris from the burlap.
- For a deeper clean, you can use a damp cloth to wipe down the wreath. Make sure to wring out the cloth thoroughly to avoid soaking the burlap. Avoid using harsh chemicals or detergents, as they can damage the burlap.
- If your wreath has any stains, you can try spot cleaning them with a mild soap solution. Apply the solution to a clean cloth and gently dab the stain. Avoid rubbing, as this can spread the stain. Allow the wreath to air dry completely before storing or displaying it.
DIY Burlap Wreath Projects for Beginners
Creating a burlap wreath is a fun and rewarding craft project that can be enjoyed by all skill levels. Whether you’re a seasoned crafter or a complete beginner, there are numerous ways to create beautiful and unique burlap wreaths that will enhance your home decor. This section focuses on simple and easy-to-follow projects designed for beginners.
Beginner-Friendly Burlap Wreath Projects, Diy burlap wreath
These projects are perfect for those just starting out with burlap wreath crafting, offering step-by-step instructions and simple designs that are easy to replicate. The key to success is to choose a project that aligns with your interests and skill level, allowing you to enjoy the process and create a beautiful wreath.
| Project | Description | Materials | Instructions |
|---|---|---|---|
| Simple Burlap Wreath with a Single Ribbon Bow | This classic and elegant design features a simple burlap wreath adorned with a single ribbon bow. It’s a versatile project that can be customized with different ribbon colors and textures to suit any occasion or style. |
|
|
| Burlap Wreath with a Cluster of Artificial Flowers | Add a touch of floral charm to your burlap wreath by incorporating a cluster of artificial flowers. This project allows for creativity and customization, using different flower types, colors, and arrangements to create a unique design. |
|
|
| Burlap Wreath with a Personalized Message | Add a personal touch to your burlap wreath by incorporating a personalized message. This project is perfect for creating a unique and meaningful gift or for adding a special touch to your home decor. |
|
|
| Burlap Wreath with a Seasonal Theme | Embrace the beauty of different seasons by creating a burlap wreath with a seasonal theme. This project allows you to showcase your creativity and create wreaths that reflect the changing seasons throughout the year. |
|
|
Burlap Wreath Gift Ideas: Diy Burlap Wreath
Burlap wreaths make wonderful gifts for a variety of occasions, from housewarmings and birthdays to holidays and special milestones. They’re a charming and rustic way to show someone you care, and the personalization possibilities are endless.
The beauty of burlap wreaths lies in their versatility. You can customize them to reflect the recipient’s personality, interests, or the occasion itself. From incorporating their favorite colors and themes to adding meaningful accents like personalized ribbons or charms, you can create a truly unique and heartfelt gift.
Customizing Burlap Wreaths for Specific Recipients and Occasions
To ensure your burlap wreath gift is well-received, consider the recipient’s preferences and the occasion. Here are some ideas for customization:
- For a new homeowner: Choose colors and accents that complement their home décor. You could add miniature house-shaped charms, a welcome sign, or even a small potted plant.
- For a birthday: Incorporate the recipient’s favorite colors, hobbies, or interests. For a gardener, add miniature flower pots or a small bouquet of silk flowers. For a book lover, include miniature books or a bookmark.
- For a holiday: Use festive colors and decorations. For Christmas, add ornaments, pine cones, and ribbons in red and green. For Thanksgiving, incorporate fall colors like orange, yellow, and brown, and add miniature pumpkins or gourds.
- For a wedding: Choose colors that match the wedding theme. Add a “Just Married” sign, miniature wedding bells, or a small bouquet of silk flowers.
Packaging and Presenting Burlap Wreaths as Gifts
The way you present your burlap wreath gift can make a big difference in its impact. Here are some ideas for packaging and presentation:
- Gift Wrap: Use kraft paper or burlap fabric to wrap the wreath. Tie it with a ribbon or twine in a coordinating color.
- Gift Box: If the wreath is small, you can place it in a decorative box. Add tissue paper or shredded paper for a more luxurious look.
- Gift Basket: Combine the wreath with other gifts, such as candles, scented soaps, or a small plant, in a decorative basket.
- Personalized Tag: Add a personalized tag with a heartfelt message or a special greeting. You can also use the tag to attach a gift card.
Crafting a DIY burlap wreath is a rewarding experience, allowing you to unleash your creativity and personalize your decor. Whether you’re a seasoned crafter or a beginner, the versatility of burlap offers endless possibilities for creating unique and beautiful wreaths that reflect your personal style. So, gather your supplies, embrace the rustic charm of burlap, and let your imagination run wild as you embark on your DIY burlap wreath journey.
A DIY burlap wreath is a charming way to add rustic elegance to your home. If you’re looking for a bit more sparkle and movement, consider adding a touch of whimsy with a DIY beaded curtain to your decor. The gentle clinking of the beads as they move in the breeze adds a touch of magic, just like the rustic charm of a burlap wreath.

